Sometimes, a TorBox on a Raspberry Pi 3 Model B+, a Raspberry Pi 4 Model B, or a Raspberry Pi 5 is too big or expensive to use, and a TorBox on a cloud is not a feasible solution. Wouldn’t it be nice if TorBox were smaller and stealthier? That’s precisely the aim of the TorBox mini.
For TorBox mini, we need the following:
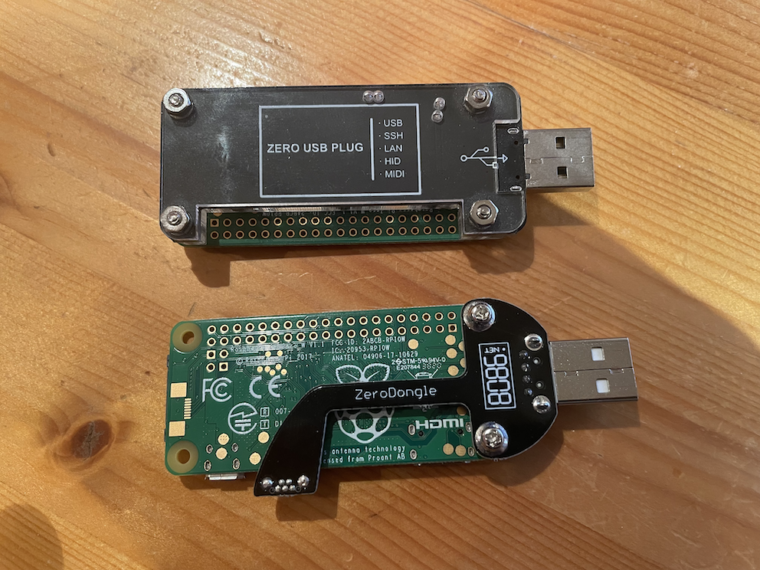
- A Raspberry Pi Zero 2 W with an SD Card (at least 16 GB)
- An USB-A adapter for the Raspberry Pi Zero 2 W (some solderless options: here, here or here) or a Micro-USB male to USB-A male cable.
- RNDIS/Ethernet Gadget support for the machine you want to plug in the Raspberry Pi Zero 2 W with the TorBox mini configuration. For more information, see further below.
There are two different ways to create an SD Card with TorBox mini for a Raspberry Pi Zero 2 W:
- Using our image file (this is the recommended default way)
- Using our installation script
- Addendum: How to install RNDIS/Ethernet Gadget support?
- Addendum: What can I do, if DHCP doesn’t configure my RNDIS/Ethernet Gadget?
- Addendum: Fix for unstable SSH client connections
• • •
Using our image file (recommended)
This is the recommended and probably easiest way to install TorBox mini on a Raspberry Pi Zero 2 W:
- Download the latest TorBox mini image file (TorBox v.0.5.5 based on Raspberry Pi OS “Trixie” lite 64bit with the Linux Kernel 6.12.75 and Tor version 0.4.9.5 with obfs4proxy version 0.0.14 and Snowflake 2.12.1; ~1 GB) and verify the integrity of the downloaded file.
- Transfer the downloaded image file to an SD card, for example, with Balena Etcher (you may need to decompress the .xz file first) or the Raspberry Pi Imager. TorBox requires at least a 16 GB SD Card.
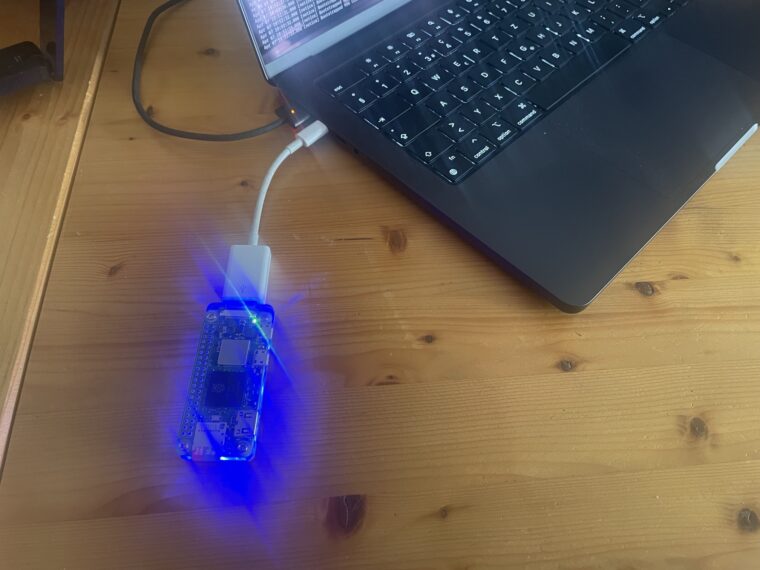
- If done, insert the SD Card into the Raspberry Pi Zero 2 W, then connect it to a USB-A adapter as shown in the photo above. Plug the Raspberry Pi Zero 2 W into a USB-A connector in your client machine.
- As soon as the Raspberry Pi Zero 2 W gets power, the operating system on the SD Card starts to unpack the system and restart the Raspberry Pi Zero 2 W again. After 5 minutes, when the green LED stops flickering, check if the RNDIS/Ethernet Gadget is recognised and configure it to use DHCP to get the network configuration from TorBox mini. Important: You must turn off all other network connections on your client machine to avoid interference and ensure all data is routed through the TorBox mini.
- Login to the TorBox mini using a SSH client (192.168.44.1) or a web browser (http://192.168.44.1; username: torbox / password: CHANGE-IT).
- After seeing a welcome screen and answering initial questions during the first start-up, you should see the TorBox Main Menu. Select the preferred connection setup and change the default passwords as soon as possible (the associated entries are in the configuration submenu).
• • •
Using our installation script
- Download the latest version of Raspberry Pi OS Lite (64-bit) or Raspberry Pi OS Lite (32-bit), or use the Raspberry Pi Imager and choose, under Operating System, Raspberry Pi OS (other), the Raspberry Pi OS Lite (64-bit) or Raspberry Pi OS Lite (32-bit) image.
- If you don’t use the Raspberry Pi Imager, then transfer the downloaded Raspberry Pi OS Lite image to an SD Card, for example, with Etcher. TorBox requires at least a 16 GB SD Card.
- Insert the SD Card into a Raspberry Pi 3 Model B+, Raspberry Pi 4 Model B, or Raspberry Pi 5. Yes, that’s correct – we have to build the SD Card for a Raspberry Pi Zero 2 W on a regular Raspberry Pi.
- If asked, create a user “torbox” and remember the chosen password for later use.
- Ensure stable Internet connectivity, download and execute our installation script (for options, use
--help):
cd
wget https://raw.githubusercontent.com/radio24/TorBox/master/install/run_install.sh
chmod a+x run_install.sh
./run_install.sh --torbox_mini
The installation script supports the following options:
Syntax : run_install.sh [-h|--help] [--randomize_hostname] [--select-tor] [--select-fork] [--select-branch branch_name] [--step_by_step]
Options: -h, --help     : Shows this help screen ;-)
         --randomize_hostname
                        : Randomizes the hostname to prevent ISPs to see the default
         --select-tor   : Let select a specific tor version (default: newest stable version)
         --select-fork fork_owner_name
			            : Let select a specific fork from a GitHub user (fork_owner_name)
         --select-branch branch_name
                        : Let select a specific TorBox branch (default: master)
         --on_a_cloud   : Installing on a cloud or as a cloud service
         --torbox_mini  : Installing TorBox mini on a Raspberry Pi Zero 2 W
         --step_by_step : Executes the installation step by step
         --continue_with_step"
                        : Continue the installation with a certain step
- If done, insert the SD Card into the Raspberry Pi Zero 2 W, then connect it to a USB-A adapter as shown in the photo above. Plug the Raspberry Pi Zero 2 W into a USB-A connector in your client machine.
- The operating system on the SD Card starts as soon as the Raspberry Pi Zero 2 W is powered on. After 3-5 minutes, when the green LED stops flickering, check whether the RNDIS/Ethernet Gadget is recognised, and configure it to use DHCP to obtain its network configuration from TorBox mini. Important: You must turn off all other network connections on your client machine to avoid interference and ensure all data is routed through the TorBox mini.
- Log in to the TorBox mini using a SSH client (192.168.44.1) or a web browser (http://192.168.44.1; username: torbox / password: CHANGE-IT).
- After seeing a welcome screen and answering some initial questions during the first start-up, you should see the TorBox Main Menu. Select the preferred connection setup and change the default passwords as soon as possible (the associated entries are in the configuration submenu).
The TorBox mini can also be installed on a Debian-based system, such as DietPi, which may be more performant on a Raspberry Pi Zero 2 W than Raspberry Pi OS. For the installation, follow the steps above, but of course, flash a compatible Debian-based image on the SD Card instead of a Raspberry Pi image (for DietPi see here). Also, you have to use the installation script for Debian-based systems (run_install_on_debian.sh):
cd
wget https://raw.githubusercontent.com/radio24/TorBox/master/install/run_install_on_debian.sh
chmod a+x run_install_on_debian.sh
./run_install_on_debian --torbox_mini
Regarding the installation of Debian-based systems (including DietPi), please also consult the Footnotes section on our TorBox installation page.
• • •
Addendum: How to install RNDIS/Ethernet Gadget Support?
When plugged into a Mac, the Raspberry Pi Zero 2 W with the TorBox mini configuration will be recognised as a RNDIS/Ethernet Gadget, which you can use like any other network interface (e.g., Ethernet or Wi-Fi). This may take 3-5 minutes because Raspberry Pi OS needs to expand the file system and restart. Under macOS, no additional software is required for installation.
Under Linux, the g_ether driver is needed to use a RNDIS/Ethernet Gadget. Most likely, the kernel module will be automatically loaded by plugging in the Raspberry Pi Zero 2 W. If this is not the case, use modprobe g_ether to load the module. If successful, usb0 will be available as a network device, which can be used as every other network device. You can check if the module is loaded with lsmod (see also here).
Under Windows, a little bit more work is necessary:
- Install a RNDIS/Ethernet driver as explained here. If this is not working, try it manually a explained here.
- Install Bonjour for Windows.
- In Windows’ firewall settings (
Settings\System and Security\Windows Defender Firewall\Authorized Apps) Windows’ Bonjour service needs the allowance to access public networks. - If the Raspberry Pi Zero 2 W is connected, Windows detects a new, unidentified network without Internet access. Now, the Pi can be accessed using a SSH client (see below).
• • •
Addendum: What can I do if DHCP doesn’t configure my RNDIS/Ethernet Gadget?
By default, TorBox mini configures your RNDIS/Ethernet Gadget interface by using DHCP. If this doesn’t work, you have to configure RNDIS/Ethernet Gadget network entries on the client as follows (this is important because using torbox.local will not work):
IPv4 address: 192.168.44.10
Subnet mask: 255.255.0.0
Router: 192.168.44.1
DNS-Server: 192.168.44.1
Next, log in to your Raspberry Pi Zero 2 W using an SSH client (we recommend using Termius) with the following options:
Address: 192.168.44.1
Login: torbox
Password: CHANGE-IT
Important: You must turn off all other network connections on your client machine to avoid interference and ensure all data is routed through the TorBox mini.
• • •
Addendum: Fix for unstable SSH client connections
Suppose you encounter installation script issues due to an unstable SSH connection. In that case, we highly recommend installing screen so that the installation will continue in the background, even in the case of a connection loss. In such a case, you can log in again with our SSH client and attach screen again to see your installation progress.
- Installation of screen:
sudo apt-get -y install screen - Log into your Raspberry Pi Zero 2 W using an SSH client
- Start screen:
screen - After losing the SSH connection, the installation will continue in the background. To see the progress, log in again with your SSH client and attach screen again:
screen -x
• • •
Appreciation
This project wouldn’t be possible without the tireless support of gozillah. He also provided a 3D design for an enclosure.