In the background, we are working on TorBox v.0.5.4 (see also this entry in our GitHub discussion board). If everything goes as planned, we will release the new image in the middle of this year. One new feature is the TorBox on a cloud functionality, which you already can test (see here for more information). On the other side of the scale, we will introduce the TorBox mini. TorBox mini is designed for spontaneous, short-term use and is not intended to run continuously for days. If, for example, the laptop goes into power-saving mode, the network connection to the RNDIS/Ethernet gadget is lost and can only be restored by unplugging the gadget and plugging it back in again. In other words, it is a super-portable, tiny, standalone Tor gateway.
I want to test it out!
If you want to test TorBox mini before the official release, download an Alpha version here or from our TorBox on the cloud test installation (the filename is torbox-mini-20240407-v054-ALPHA.gz). Internally, the TorBox is still labeled version 0.5.3 – don’t be surprised. The SHA-256 hash of the file is 751CA67D17B73C076ED4BC3BB3A86597A7EC6F2438521C88D7494922FF491264
By the way, our Secure Chat is also working on the TorBox on the cloud test installation, which I look into from time to time.
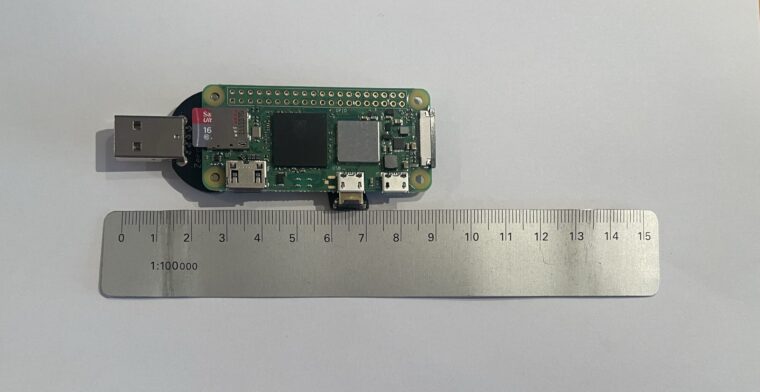
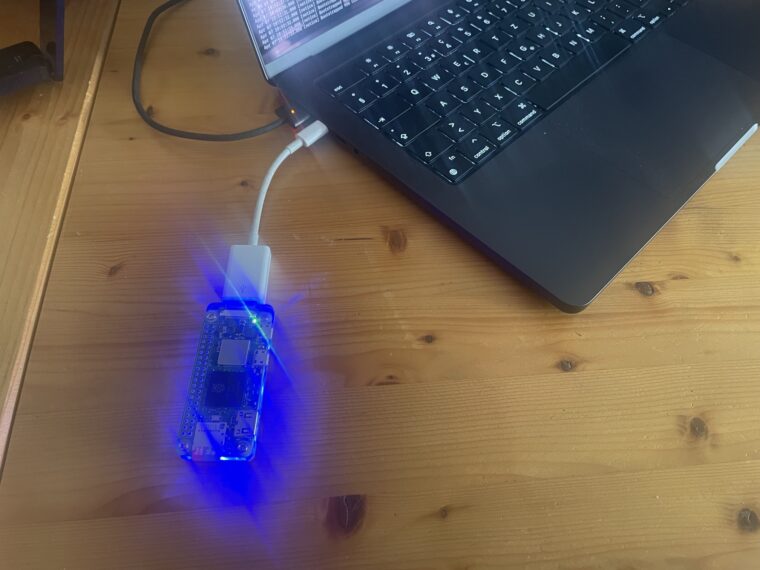
To use TorBox mini, you will need a Raspberry Pi Zero 2 W with a USB-A adapter (there are some solderless options: here, here or here) or a Micro-USB male to USB-A male cable. Alternatively, also an USB-C adapter like this one can be used. Next, please transfer the downloaded image file on an SD Card, for example, with Etcher. TorBox mini needs at least a 8 GB SD Card.
Once plugged into a USB-port of a client machine, the Raspberry Pi Zero 2 W acts as a network interface (usb0) with an internal WiFi chip (wlan0). The client will recognize it as a RNDIS/Ethernet Gadget. If all other network interfaces are turned off on the client machine TorBox mini will route the data stream from the client machine through the internal WiFi chip to the tor network. Logged into the TorBox mini with an SSH client or a web browser (http://192.168.44.1 with username: torbox and password: CHANGE-IT).
Using a RNDIS/Ethernet Gadget with different Operation Systems on the clients
Plugged into a Mac, the TorBox mini will be recognized as a RNDIS/Ethernet Gadget, which you can use as any other network interface (for example, Ethernet or Wireless). It may take 1-2 minutes to be recognized because the TorBox mini image has to expand its file system and start up again during the first start-up. Under macOS, it is not necessary to install any additional software.
With Linux, the g_ether driver is needed to use a RNDIS/Ethernet Gadget. Most likely the kernel module will be automatically loaded by plugging in the Raspberry Pi Zero 2 W. If this is not the case use modprobe g_ether to load the module. If successful, usb0 will be available as a network device, which can be used as every other network device. You can check if the module is loaded with lsmod (see also here).
For Windows users, the setup process requires a bit more effort. Here’s a step-by-step guide to get you started:
- Install a RNDIS/Ethernet driver as explained here. If this is not working, try it manually, as described here.
- Install Bonjour for Windows.
- In Windows’ firewall settings (
Settings\System and Security\Windows Defender Firewall\Authorized Apps) Windows’ Bonjour service needs the allowance to access to public networks. - If the TorBox mini is connected, Windows will detect a new, unidentified network without Internet access. Now, the main menu can be accessed using a SSH client.
Log into the Raspberry Pi Zero 2 W
TorBox mini supports DHCP. The client machine will automatically get the IP address 192.168.44.10, and the TorBox mini is set to 192.168.44.1. Because the TorBox mini needs up to one minute to start up (the first time even longer due to the expansion of the file system and a reboot), the client may fetch first a local address (169.254.x.x) but will immediately change to the correct IP address as soon as the DHCP server has started up. If, for whatever reason, DHCP is not working correctly, you should configure the RNDIS/Ethernet Gadget interface on your client machine in the following way:
IPv4 address: 192.168.44.20
Subnet mask: 255.255.0.0
Router: 192.168.44.1
DNS-Server: 192.168.44.1
Next log into your Raspberry Pi Zero 2 W using an SSH client (we recommend using Termius) or a web browser (http://192.168.44.1) with the following options:
Address: 192.168.44.1
Login: torbox
Password: CHANGE-IT
Important: You must turn off all other network connections on your client machine to avoid interference and ensure all data are routed through the TorBox mini.
In the First Start-up Dialogue and the Main Menu, choose the following entry: Wireless network (through the onboard chip; wlan0). We may remove all other connection types in the final version.
Feedback is essential for us!
We are dependent on feedback. Please tell us about your experiences with the TorBox mini test version on our GitHub discussion page.
- What do you like?
- What should be improved (why and how)?
- What would you like to see next? Which features do you request?
With the TorBox GitHub repository, it is straightforward for everyone to report issues or change the code and propose it in a pull request. Because we continue to travel around, it sometimes needs more time to address the issues and proposals.
Appreciation
This project wouldn’t be possible without the tireless support of gozillah. He also provided a 3D design for an enclosure.